Friday, December 26, 2008

Boxing Day - vine-pruning completed

Friday 26th December: another brilliantly sunny day. Ideal for completing the pruning, which this time (ie for the wall-grown grapes) entails climbing a ladder. First, a re-cap of what they looked like before pruning:


Ok. To work. For each "spur" you start by removing any old, dead wood:


In the example shown, that left two rods - last season's fruiting laterals. I pruned each of these to about two good buds ("eyes"):


The finished job:


I then repeated the process for all the spurs on all the vines. A certain amount of judgement is needed. If a rod is very thin and weedy-looking, for example, it is worth cutting it out all together to give the remaining one a better chance.

This is what the vines look like now:


Much neater, I feel.

So that's it for now. Next tasks will be in February, when I'll feed and mulch the vines. It's also a good time to plant the cuttings I prepared from the prunings.

Finally, if you're interested, take a look at this web page I set up with some FAQs on vine-growing and winemaking.

Cheers!

Wednesday, December 24, 2008

Christmas Eve - update on vine pruning


Last night's weather forecast said we'd have to "wait until Boxing Day to see any sun".
Funnily enough, today was gorgeous. Hm.

So I thought I'd continue on with the vine pruning. Remember on Sunday I was starting to prune the ones in the "open ground"? Well I finished them. Not too difficult as there are only five plants.

This is what they look like now:


Again, the contrast isn't too good because of all the shades of brown.

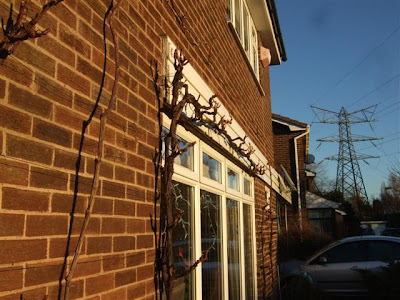
The next task will be to prune the vines growing against the house wall. Here are a few more shots of them as they are now:


You can tell how sunny it was by the sharp shadows, n'est-ce-pas?

These vines are pruned according to the "rod-and-spur" system, which is more straightforward than the Guyot method employed in many open vineyards

For the wall-grown vines all that is needed is to take back the current year's shoots to a couple of strong eyes. One of these will be allowed to develop into a fruiting lateral, and the other will be rubbed out. Because this procedure is repeated annually, a knobbly spur gradually forms, from which the method derives its name (natch). "Rod" refers to the permanent framework of old wood.

I'll post some more pics when I've pruned them.

Meanwhile, have a great Christmas.

Sunday, December 21, 2008

A Solstice job: pruning vines

Sunday 21st December - the shortest day ... at last. I can't be doing with all this doom and gloom (and not just the economic/financial variety either!)

Anyway, it's been some time since I posted anything on my blog so I thought I'd do a bit of an update on the state of the vines. December is the ideal time for pruning them (in the Northern Hemisphere, that is!) and that's what I started doing this morning.

These shots should give an idea of what the vines look like before pruning. Note that vines are deciduous, and all the leaves have fallen by now:


In the case of the vines in the open ground (as opposed to against the wall) I've adopted the Guyot system. The idea is to remove all but two or three good strong shoots of the previous season's growth. One (for Single Guyot) or two (for Double Guyot) of these shoots - technically known as "rods" - are tied to the bottom wire. If two rods are used, then one will be taken to the right of the main stem, the other to the left. The pic below shows a plant that has been partially pruned, with only one rod tied in:


I'm afraid at this time of year everything tends to be the same colour, so the contrast wasn't too good. However, I had a brain-wave: why not put a white sheet behind the subject? That certainly helped:


The next stage was to tie a rod to the other side of the stem, and completely remove the surplus one (as it is not needed).

Here's the finished job:


Once growth starts again in spring, the rods that have been tied into the bottom wire will produce "laterals" (rather a daft name in this instance because they will actually be growing more-or-less vertically upwards!). The laterals will - hopefully - bear fruit.

You maybe noticed there's another rod, much shorter than the others, sticking up at the rear of the main stem. It is important to keep one rod pruned in this way, so as to leave at least three good buds ("eyes"). These should develop into three new rods which will form the basis of the following season's crop - and they will be treated in the same way at the end of next growing season. (During the coming season these rods will not be allowed to bear fruit, but will simply be tied into the vertical cane).

I reckon it's also a good idea to think about extending your stock of plants at this time, and the prunings make ideal cuttings. I just bundle them up with a label (VERY IMPORTANT if you grow more than one grape variety) and "heel" them into the boarder in the greenhouse like this:


Then, around February they can be prepared as for any other type of hardwood cutting, and simply pushed into a convenient bit of spare ground. The base of each cutting should preferably be in a sandy or gritty medium, but in my experience it's almost impossible to prevent them from rooting, no matter what kind of soil they're in, provided it doesn't get water-logged.

A couple of years ago I did just that with some Madeleine Angevine prunings, and today I dug them up:


As you can see, they're all nicely rooted. Again, I heeled them into the greenhouse boarder, and when I get a spare hour or two I'll pot them up into something like John Innes No.2. From then on they can be potted on progressively, until big enough to plant out in a "vineyard". Of course I don't actually possess such a thing, but I do have my name down for an allotment!

I realise I haven't mentioned how the wall-vines are pruned. If anything they are even easier to deal with, but as I ran out of time they will have to wait for another day. I'll post some more information then.

Meanwhile, Happy Solstice. Oh yes, and

Merry
Christmas!


Mike

Sunday, October 26, 2008

Cider MkII - update MkII!

Sunday 26th October, and the ferment has been transferred to demijohns.
Slightly less unappetising than before, methinks!


Thursday, October 23, 2008

Cider MkII - update

Just thought you might like to know the second batch is fermenting away nicely ...

Yes, I know it looks disgusting, but just think of the story of The Ugly Duckling!

Tuesday, October 21, 2008

Cider-making Round 2

Wow! Thanks to Karen we now have about 3.5 gallons of the amber fluid on the go!
Caroline, Karen and I spent a happy hour or two on Karen's allotment last saturday, completely filling a brew tub and a toy box with an assortment of wind-falls, conventionally-picked and "shake-fall" apples. (Hmm. Remind me we need to take cycle crash helmets next time!)

Here we are hard at work:


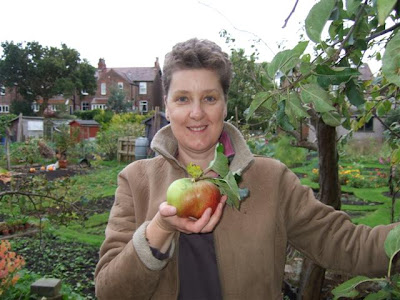
Karen.

The following day (Sunday), Caroline and I set to slicing pummelling and pressing.
I even made a specialist piece of equipment for the pummelling (officially known as "milling"). It's an ultra-modern hi-tech length of 3-by-2 with a length of broom handle through it. A kind of artificial foot - which I intend to use next year for "treading" the grapes!

The previous week's gallon I transferred to a demijohn, and I added a small sample of this fermenting "must" to the new batch, so as hopefully to preserve the generation of yeast. I'm still waiting for it to really get going, but it looks promising.

Here we are:

Caroline ...


... in somewhat more mirthful mode!


Me (well you know that!) with the amazing pummeller.


Assorted debris after pressing finished.


Beneath that piece of bubble-wrap (designed to keep the air out) is 2.5 gallons of apple juice.

Roll-on tasting time!